When water damage hits your home, the instinct is to start cleaning up right away. However, doing so before documenting the damage can actually work against you when it’s time to file a claim.
Knowing how to document water damage for insurance is one of the most important steps you can take before cleanup begins. At East End Flood & Fire Restoration, we walk homeowners through this process on nearly every call, because good documentation can mean the difference between a smooth claim and a denied one.
In this guide, we’ll cover exactly what to photograph, how to build an itemized inventory, and how to balance documentation with your duty to prevent further damage. We’ll also show you when it makes sense to bring in a professional team for support.
Key Takeaways
- Documenting damage before cleanup begins protects your claim and helps prevent disputes with your insurer.
- Photos and video should capture the damage from multiple angles, including wide shots and close-ups.
- An itemized inventory of damaged property, with receipts or estimated values, strengthens your claim.
- Most policies require you to take reasonable steps to prevent further damage, even while preserving evidence.
- A professional restoration team can provide documentation that supports your claim, especially for hidden damage.
Why Documentation Matters Before Cleanup Starts
Once cleanup begins, evidence disappears fast. Wet carpet gets pulled up, damaged drywall gets torn out, and the visual proof your insurer needs starts to vanish along with it.
So, what happens if you don’t document water damage properly? In many cases, it leads to delays, disputes, or a reduced payout. Adjusters rely on evidence to confirm the cause and extent of the damage. Without it, your claim can quickly become a back-and-forth negotiation.
That’s why documentation should always come first, even in the middle of an emergency.
What Photos and Videos to Take (and How)
So, what photos should I take for a water damage insurance claim? Start wide, then go close. Here’s a simple documentation checklist to follow:
- Take wide shots of the full room to establish context
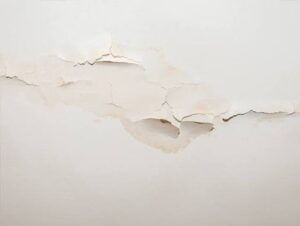
- Follow with close-up photos of specific damage, like water stains or standing water
- Capture ceilings, floors, walls, and affected belongings from multiple angles
- Record a short video walkthrough for extra context
- Include a timestamp or dated photo whenever possible
Together, this creates a clear, well-rounded record for your water damage documentation checklist.
Not Sure You’re Documenting the Damage Correctly?
Get a professional documentation walkthrough from East End Flood & Fire Restoration’s certified team.
Creating an Itemized Inventory of Damaged Property
Beyond photos, your insurer will want a list of exactly what was damaged. For each item, note the approximate purchase date, condition, and estimated value.
A common question here: do I need receipts for water damage claims? Receipts help, but they’re not always required. If you can’t find them, bank statements, product photos, or reasonable estimated values can fill the gap. The goal is simply to give your insurer as much detail as possible.
Should You Wait for the Adjuster Before Cleaning Up?
Can I start cleanup before the adjuster arrives? Yes, in most cases. You don’t need to wait for the adjuster to begin addressing the damage. However, document everything first, and avoid discarding items until they’re fully recorded for your claim.
As a result, you can move quickly to limit further damage while still protecting your claim.
Your Duty to Prevent Further Damage vs. Preserving Evidence
Most insurance policies include a mitigation clause. In other words, you’re expected to take reasonable steps to stop the damage from getting worse, even before your claim is fully processed.
The good news is that mitigation and documentation aren’t in conflict. You can remove standing water, run fans, or tarp a roof leak, as long as you photograph the damage first. Acting quickly to protect your home doesn’t mean skipping the paper trail your insurer needs.
Protect Your Claim From Day One
East End Flood & Fire Restoration offers 24/7 emergency response paired with professional documentation.
What to Keep, What to Discard, and How to Document It Either Way
Some materials, like saturated drywall or insulation, need to come out quickly for safety and mold prevention. Others can wait until your claim is further along.
Either way, the rule stays the same: document first, discard second. Take before-and-after photos of anything you remove, and hold onto damaged items when possible until your insurer confirms they’re no longer needed.
Working With a Professional Restoration Team for Documentation
Do I need a professional inspection before filing a claim? It’s not required, but it’s strongly recommended. Professional teams use moisture readings and thermal imaging to detect hidden damage that homeowner photos simply can’t capture.
That leads to another common question: what’s the difference between documentation and a professional assessment? Homeowner documentation captures what’s visible. A professional assessment goes further, identifying moisture behind walls and under flooring that could lead to mold later. Our team follows the same standards covered in our guide on Water Damage Restoration Certifications: What IICRC Means and Why It Matters.
If your claim is already underway, our related guide on Water Damage Insurance Claims in New York: What Homeowners Need to Know walks through what to expect next.
Frequently Asked Questions
What photos should I take for a water damage insurance claim?
Take wide shots showing the full room, then close-ups of specific damage. Capture ceilings, floors, walls, and affected belongings from multiple angles. Include a timestamp or dated photo alongside each image whenever possible to establish a clear timeline for your insurer.
Can I start cleanup before the adjuster arrives?
Yes, but only after documenting the damage first. Photograph and inventory everything, then take reasonable steps to prevent further damage, like removing standing water. Avoid discarding damaged items until they are fully documented for your claim.
Do I need receipts for water damage claims?
Receipts strengthen your claim but are not always required. If you cannot find them, use bank statements, photos of the item in use, or reasonable estimated replacement values. Document as much detail as possible for each damaged item.
What happens if I don't document water damage properly?
Insufficient documentation can lead to claim delays, disputes, or reduced payouts. Adjusters rely on evidence to verify the cause and extent of damage. Without clear photos and records, your insurer may question the claim's validity.
Do I need a professional inspection before filing a claim?
It's not required, but strongly recommended. Professionals use moisture readings and thermal imaging to detect hidden damage homeowner photos miss. This documentation often strengthens your claim and speeds up the approval process.
The Bottom Line
Knowing how to document water damage for insurance before cleanup begins can protect your claim from day one. Photograph everything, build an itemized inventory, and take reasonable steps to prevent further damage without erasing the evidence your insurer needs.
If you’re facing water damage right now, our certified team can help you document the damage correctly while responding to the emergency at the same time.
Don't Let Poor Documentation Cost You Your Claim
Water damage moves fast, and so should your documentation. East End Flood & Fire Restoration’s certified team can respond immediately, providing professional-grade photos, moisture readings, and detailed reports that support your insurance claim from the very first hour. Contact us today for 24/7 emergency response and documentation you can trust.
Get Documentation That Strengthens Your Claim
Request a professional assessment from East End Flood & Fire Restoration — available 24/7 across the East End.